
Flows in Junipeer
The Flows page is the operational control panel of your integration. Once onboarding is complete and scheduling is running, this is where you can do actions outside of automation and trigger manual syncs. This guide explains what the page shows, what each button does, and when to use manual syncing over automated scheduling.
What the Flows page shows
The Flows page lists every enabled flow in your integration, grouped by direction. For a generic integration, you might see:
Outbound - Export Orders, Export Payouts, Export Products, Export Refunds, Transform Fortnox orders to Invoices
Inbound - Export Stocks, Update Order Statuses
The choice and the options may differ, depending on the connector.
Each flow is presented as a card with:
Flow name — what the flow does (e.g. Export Orders to Fortnox)
Export One / Export Many buttons — for manually triggering syncs
Last synced timestamp — when the flow last ran automatically or manually
Settings gear — quick access to flow-specific configuration
Flows only appear on this page if they were enabled during onboarding in Step 1 — Select flows. To enable additional flows later, go back to Get Started → Select flows.
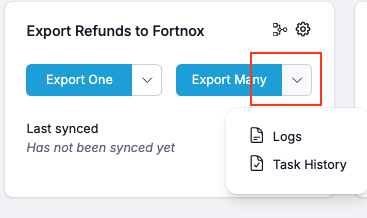
You can quickly access logs and tasks connected to each flow by clicking the dropdown:
Manual sync
After clicking "Export One" or "Export Many", you will be given input fields that are dependent on your connected systems. They might look like this:
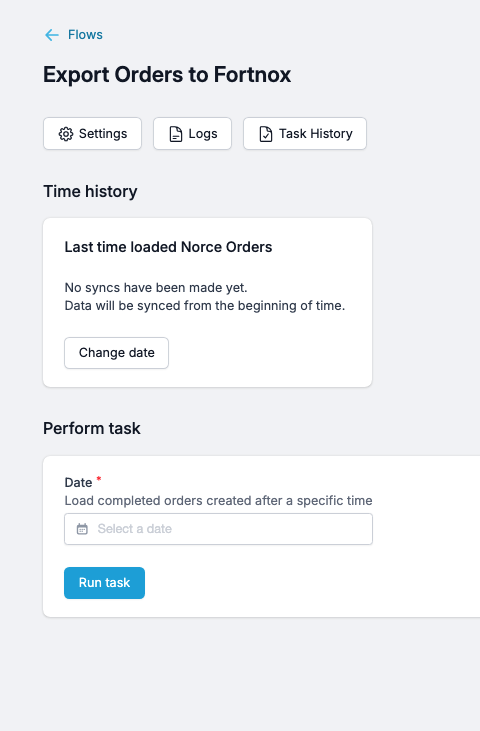
(Export Orders to Fortnox, Norce - Fortnox connector)
You can adjust the last time the fetch was done, but it's best not to change the date, unless there is a strong reason behind it.
Performing a task usually requires some input:
Date range
IDs
With these specified, you can run your manual sync. Make sure to check the outcome in Logs.
Complete guide
More information on Flows is available in this GUIDE