
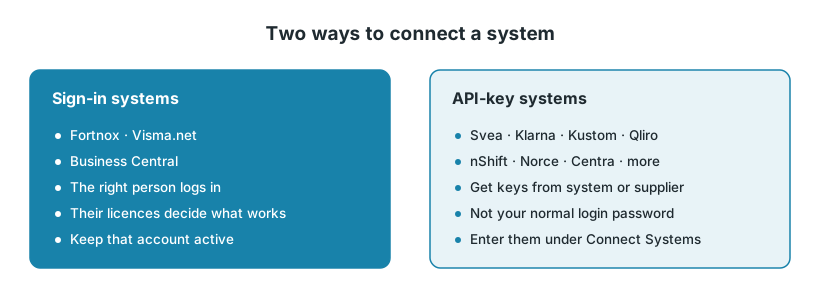
You connect your systems under Get Started → Connect Systems. Some systems are connected by the right person logging in. For the others you enter API keys from the system or its supplier, never your normal login password.
1. Four rules
An API key is not your login password. The username and password for a system's admin pages won't work.
For sign-in systems, the account decides what Junipeer can do. Junipeer works with that account's licences and permissions. If the account is removed or its licence ends, the integration stops.
Enter keys yourself under Connect Systems. Never send passwords or secrets by email or chat. Secrets are hidden once saved.
Wait for the green checkmark on every system before you configure anything.
2. Systems you sign in to
Fortnox
You need: a Fortnox user with the licences Order, Faktura and Bokföring, and the Integration licence on the company. Use a separate user for the integration, not a personal admin account.
Common mistake: no Order licence. You get "Det finns ingen aktiv licens för önskat scope". It is needed even if you only want invoices, because Junipeer creates the order first.
Business Central
You need: a Microsoft user in your Business Central environment with a Business Central licence (BC Essentials) and the permissions in the setup guide. Choose the right environment and company when you sign in.
Common mistake: an account without a Business Central licence. Orders then fail with "Your license does not grant you the following permissions on TableData 36 Sales Header: Insert". Sign in again with a licensed account.
More: Business Central Setup
Visma.net
You need: a Visma.net user with administrator rights, and the Financial and Customers modules active (Inventory too if you sync stock).
Common mistake: waiting for an API key. Visma.net has none. The administrator logs in through Junipeer.
More: Visma.net Setup
3. Systems that use API keys
Centra
You need: the Centra GraphQL Url, a Centra GraphQL Access Token, and which store and market to connect.
More: Centra Setup
Klarna and Kustom
You need: the settlements API Url, API user/id and API password or secret from your Klarna or Kustom contact.
Common mistake: mixing the two up. The URL is usually
https://api.klarna.com/settlements/v1/for Klarna andhttps://api.kustom.co/settlements/v1/for Kustom.More: Klarna ↔ Fortnox, Kustom ↔ Fortnox
Monitor
You need: API URL (for example
https://host:8001), the Username and Password Junipeer should use for the Monitor API, Company Number (for example001.1) and Language Code. Whoever runs your Monitor installation can give you these.
Norce
You need: Norce Client name (the first part of your Norce address,
[CLIENT_NAME].api-se.norce.tech), Client ID and Client Secret (in Norce admin under Settings » Users » OAUTH) and Default application ID. Your Norce partner or agency usually has them.Common mistake: forgetting the Norce Client name. You can't connect without it.
More: Norce Setup
nShift
You need: Nshift Username / ID and Nshift Password or Secret ID, from the API-Keys section in nShift. If a logistics partner owns your nShift account, ask them.
Common mistake: using nShift Web-TA. It has no REST API and can't create API keys. Junipeer needs API keys from nShift Delivery.
Pyramid
You need: the API Url and Token for your Pyramid API. Your Pyramid partner or consultant usually has them.
Qliro
You need: Api Key and Api Secret. Crediting refunds also needs Qliro API Plus credentials.
Tip: copy the values exactly, without spaces before or after.
More: Qliro ↔ Fortnox
Specter
You need: Specter Api User ID, Specter Sbm Id and Specter Api User Key. Leave Specter PLUS Api Keys and Specter Payment Api Keys empty unless your setup uses them.
More: Specter — setup guide
Svea
You need: Merchant ID and Secret from Svea Admin. Your Svea contact has both.
Common mistake: entering your Svea Admin login. The Merchant ID is a number; the Secret is a long string of letters and numbers. Each Svea merchant account needs its own setup.
More: Svea ↔ Fortnox
Shopify: see Shopify Setup, or grant Junipeer collaborator access and we set it up.
4. Get everything ready before you start
Open Get Started → Connect Systems and note which systems your integration uses.
For each sign-in system, book a few minutes with the person whose account has the right licences.
For each key system, ask the supplier or partner for the values above, and enter them yourself.
When every system shows a green checkmark, continue with Configure Settings.
If a choice list in the settings is empty later, the connection is usually the problem, not the setting.
5. When to contact support
Email support@junipeer.io if a system gets no green checkmark with the values you were given, or your supplier says they can't create API keys. Say which system and what you tried. Never include passwords or secrets.